We gamers love our maps! I spend a good deal of time over at The Cartographers’ Guild, and I have been known to occasionally contribute a tutorial over there. This one has been among my more popular offerings, so I thought I’d share it here, too.
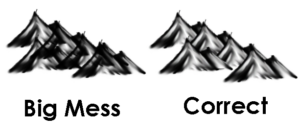 Anyone who has made brushes in Photoshop has doubtless learned that you cannot make a two-toned brush. That is, if you make a tree brush and try to overlap two strokes with it, the tree beneath will show through the one on top. The reason for this is that Photoshop’s brushes are a grey-scale image where black pixels are completely opaque, white pixels are transparent, and grey pixels are translucent. This allows you to paint with the brush in any color you want, but it prevents you from using it to make nice isometric mountains and forests:
Obviously, that brush is just a hack job I made for the purposes of this tut, so don’t complain about its lack of quality. Anyway, when you use a brush in the way Photoshop intends, you get results like those on the left. I intend to show you how to make the same brush give you what appears on the right.
The first thing to do is to create or load your brushes. If you’re only going to use them for a single map, it isn’t really necessary to save the image as a brush, but it is handy if you want to do more than one map in a certain style. I won’t cover that, since there are loads of brush-making tuts out there already.
The next thing is to create a palette area in your document from which you can sample the brushes. You can do this in a separate document, but it’s easier if you do it in the same doc you’re working in. Go to Image > Canvas Size… (Alt + Ctrl + C). Set your Anchor Point to one of the sides of your existing canvas. This will cause the new area to appear on the opposite side of the one you clicked.
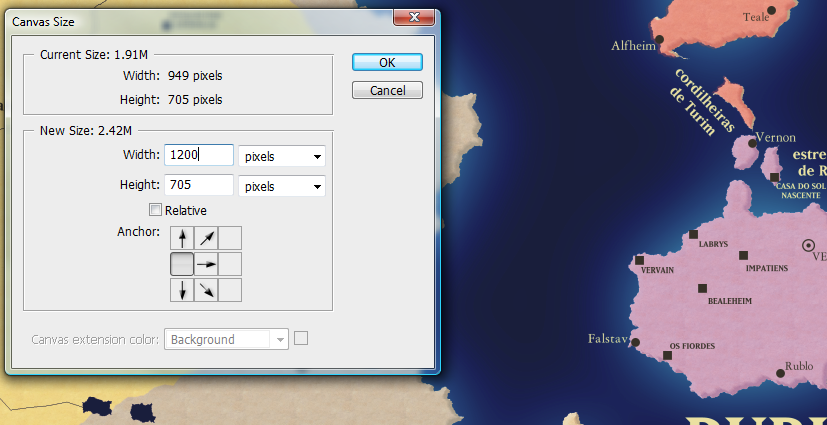
You want to expand the width (or height, if you set your Anchor Point on the top or bottom) enough to hold the brushes you plan to use.
Now you should have a transparent section to one side of your canvas. Make a new layer to hold your palette, and drop a single stroke of your bush in that area, like so:
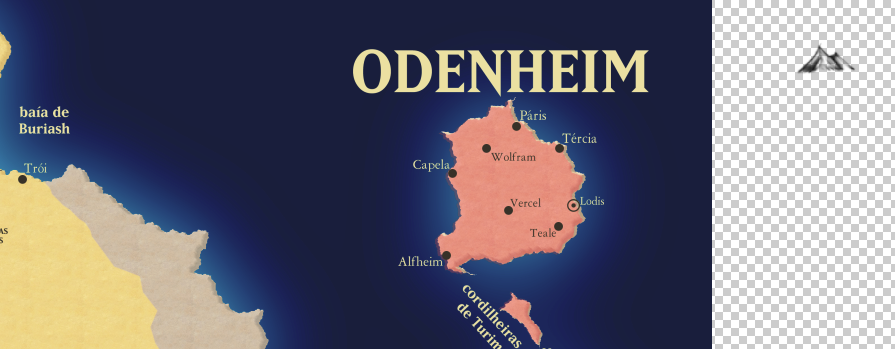
You’ll notice that the tranparency checkerboard grid is showing through the mountain. If you move the layer over your existing map, you’ll see the map’s colors and lines showing through it. This tells you that if you just layer the brush over itself, the copies underneath will show through. So the next step is to paint white behind the brush as a mask. Make a new layer and put it beneath the palette layer, then just paint in white where you want the brush to act as a mask.
Here I’ve moved my sample over onto the map to illustrate how the background no longer shows through:
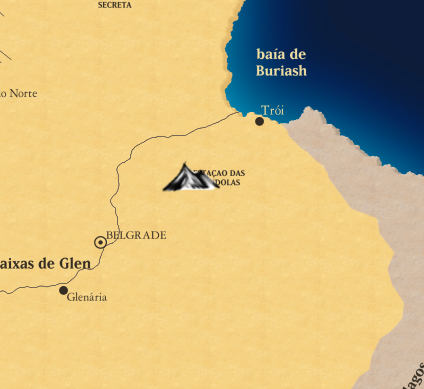
The white underpainting prevents background pixels from showing through.
Now, grab the Clone Stamp Tool (S), make sure that the “Sample” box shows “All layers,” and the “Aligned” box is unchecked.
“Current layer” only takes the sampled pixels from the layer you’re currently working on, which would force you to constantly change back to your palette layer to pick a new brush. “Current and below” samples from the layer you are working on and all the layers beneath it, which will work if you place your palette beneath your working layers.
“Aligned” causes the sample point to remain in the same place relative to the cursor after your first click, which is handy for many other purposes but not useful for what we’re doing here. Turning it off ensures that your sample point stays put.
Change the size of the clone stamp so that it contains only your mountain ( [ and ] ) and make sure the Hardness is set to 100% (right-click and move the Hardness slider).
Alt-click in the center of your mountain. Since you’re set to sample all layers, you’ll get the black and grey of your normal brush, the white underlayer, and transparency around it.
Create a new layer to hold your mountains and change its blend mode to Multiply. This will allow the background to show through, but the white will still mask out the mountains beneath!
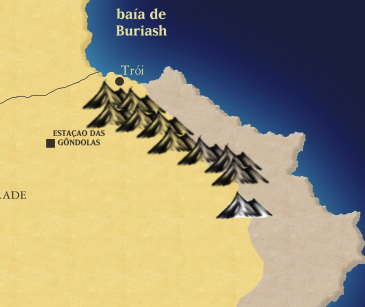
The mountains layerd on with the multiply blend-mode.
As you can see, most of the mountains let the background show through, but the mountains themselves are opaque to one another. I also put in one set to the Normal blend mode so you can see the difference.
For best results, you’ll want to make several different variations of your mountains, but since they’re all stored in that palette area to the side of your document, when you want to change to a different mountain, all you need to do is to alt-click the mountain you want to use, then stamp away.
The clone stamp can also be used to take bits from one image and stamp them into another, so if you want to keep all of your isometric mountains and trees in a single document that you use for every map you make, you can just keep that image open to one side and sample from it instead, saving you the time of prepping the palette inside your working doc. That also has the advantage of letting you pan around your working image while leaving the palette in place.
Remember to work from top to bottom when using isometric stamps. That will ensure that they layer properly.
